60 W CO2 Laser · Volume 4
Modifications and the LightBurn Workflow
4.1 Why these machines get modified
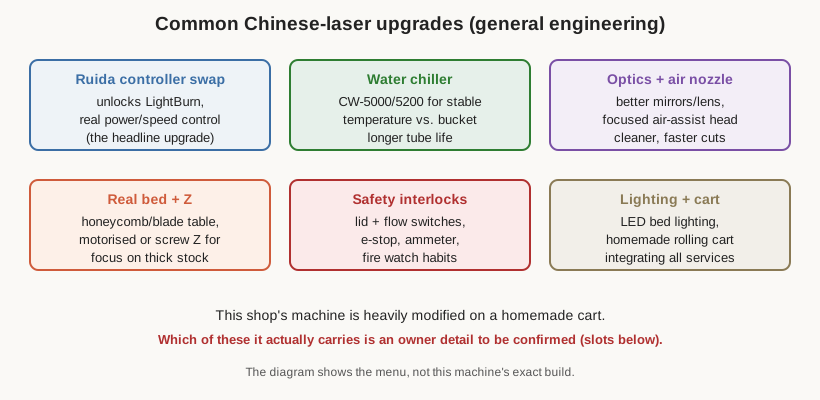
A large-format Chinese CO2 laser arrives as a capable platform wrapped in cost-cutting. The tube, the frame, and the flying optics are fundamentally sound; the electronics, the optics quality, the cooling, the bed, and the safety features are where the factory saved money. That gap is why almost every serious owner ends up modifying the machine, and why the upgrades cluster around the same short list. That list is treated here as general engineering — what each upgrade is, why owners do it, and what it changes — while leaving the specifics of this machine’s build as clearly marked owner slots, because inventing them would mislead. The second half turns to LightBurn, the software that most of the electronics upgrades exist to unlock, and walks a job from imported file to finished part.
4.2 The controller swap: the headline upgrade
The single most transformative modification is replacing the stock controller with a Ruida DSP board. As covered in Volume 2, the stock M2Nano / Moshidraw platform is closed, limited, and unpleasant, and — decisively — it cannot run modern software. A Ruida controller (an RDC6442G, RDC6445, or similar) changes the machine’s character entirely: it brings true PWM power control, smooth acceleration so cuts are clean through corners, layered jobs with independent speed and power per layer, position and repeat and array functions, interlock inputs, and a genuinely useful keypad panel. Above all it unlocks LightBurn.
The swap is real work but well within a capable maker’s reach. It means fitting the new DSP board and its keypad panel, rewiring the X, Y, and limit-switch connections to the new pinout, wiring the LPSU’s enable and PWM lines to the Ruida’s laser-control output, and connecting the interlocks and any Z or rotary outputs. The community documentation for this is deep, because it is such a common upgrade. The result is a machine that feels, from the operator’s chair, like a completely different and far better tool. Whether this machine wears a Ruida or still runs its stock board is an owner detail.
4.3 Optics, air, cooling, bed, and safety
Beyond the controller, the upgrades follow the weaknesses of the stock machine.
Better optics and an air-assist nozzle. Stock mirrors and lenses are often mediocre, and the stock air arrangement is frequently an afterthought. Fitting quality mirrors (molybdenum or coated silicon) and a good zinc-selenide focusing lens, in a head with a well-designed air-assist nozzle that directs a tight jet of air around the beam, sharpens cuts, speeds them up, and reduces charring. This is one of the highest-value-per-dollar upgrades after the controller.
A real water chiller. Swapping a bucket-and-pump for a refrigerated CW-5000/5200 chiller (Volume 3) gives stable coolant temperature, monitoring, and alarms — worth it for tube life and consistency.
A proper bed. Replacing a crude slat or flat bed with a honeycomb or blade table supports the work on minimal contact, lets smoke and the spent beam pass through instead of reflecting back to scorch the underside, and lets air and exhaust flow freely.
A motorised Z axis. Motorising the bed’s up-and-down movement (Volume 2) lets the software set focus for any material thickness automatically, instead of shimming or hand-cranking.
LED lighting. A simple LED strip inside the cabinet makes it far easier to place work, read alignment, and watch a cut — a small, popular quality-of-life addition.
Safety interlocks. Restoring or adding the lid switch, flow switch, emergency stop, key switch, and an ammeter to read tube current directly (Volume 3) is unglamorous but among the most important modifications, because stock machines so often ship with these weak or bypassed.
Each of these is genuine engineering that any owner in this category might do, in any combination. The specific set this machine carries — and the way they are integrated onto its homemade cart — is left open.
4.4 Motion, mechanical, and accessory upgrades
A second tier of upgrades addresses the machine’s mechanics and adds capability. On a large-format machine the belts and rails carry more length than a small machine, which means more belt stretch and more chance for the gantry to rack out of square; owners commonly fit better belts, upgraded idlers and tensioners, and clean or replace the linear bearings to tighten up the motion. Squaring the gantry — making sure the bridge is exactly perpendicular to its rails so a commanded square comes out square — is a tune-up that pays off in every job. A stiffer or re-flattened bed frame helps keep the whole working area in a single focal plane, which matters more the bigger the bed gets.
Two accessories extend what the machine can do. A camera mounted in the lid, supported directly by LightBurn, photographs the bed and overlays a live image of the material behind the design workspace; the operator can then place artwork visually onto an irregular offcut or a pre-printed sheet and line up engraving on an existing object, rather than measuring by hand. A rotary attachment replaces part of the bed with a set of driven rollers or a chuck that turns a cylindrical object — a tumbler, a bottle, a tube — under the stationary head so the machine can engrave all the way around it; the Ruida controller and LightBurn both support driving a rotary axis. Neither is essential, but both are popular additions that a modified machine may carry, and both are the kind of owner-specific detail these volumes leave as slots rather than assume.
4.5 LightBurn: the software the machine deserves
LightBurn is the software the laser community has standardised on, and it is the reason the Ruida controller matters so much. It is a single program that both designs or imports the artwork and drives the machine, replacing the clumsy stock software with something built specifically for lasers. It talks natively to Ruida DSP controllers (among many others), which is why “the LightBurn upgrade” and “the Ruida upgrade” are really the same project seen from two ends. The workflow it enables follows.
4.6 A job from start to finish
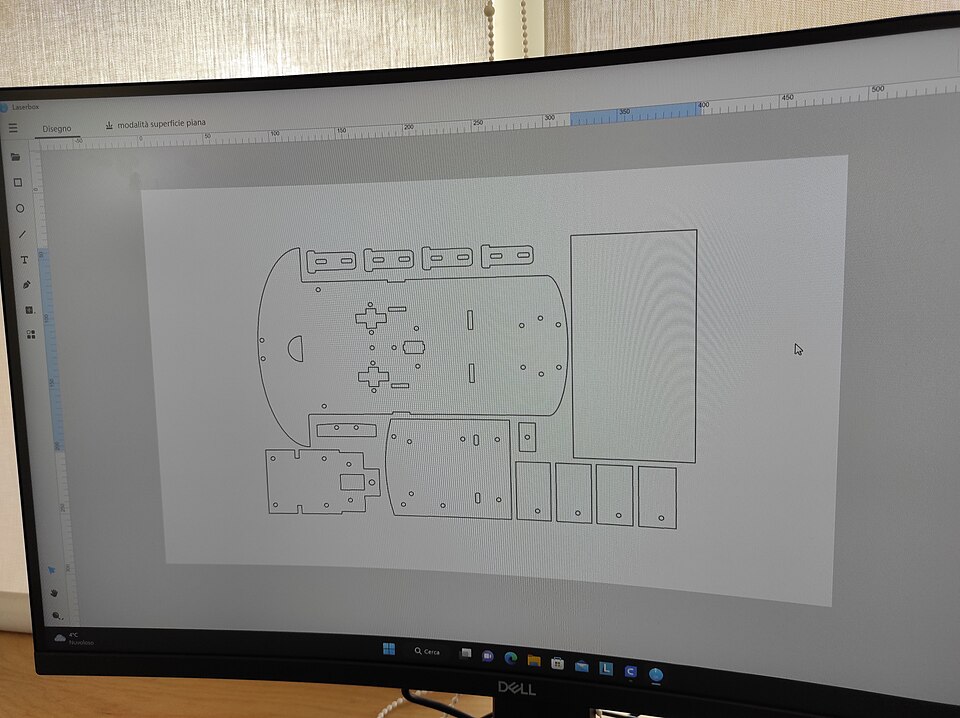
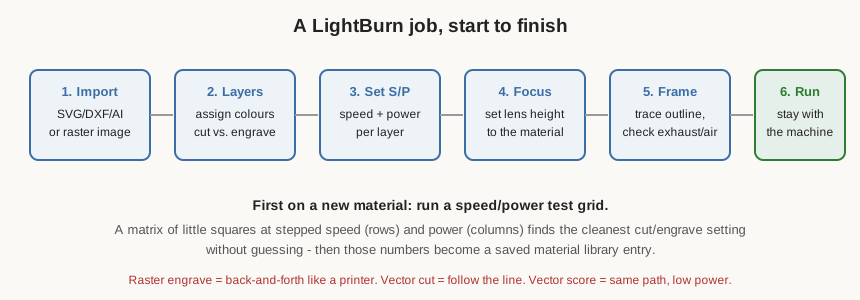
Import. A job begins with artwork. LightBurn opens vector files — SVG, DXF, AI, PDF — where shapes are defined as lines and curves ideal for cutting and scoring, and raster images — PNG, JPG — for photo engraving. It can also draw and edit shapes and text directly. The imported design is arranged on a workspace that represents the machine’s bed to scale, so the operator places the parts exactly where the material sits.
Layers. Every object is assigned to a layer, identified by colour. Layers are how one file mixes operations: a red layer might cut all the way through, a blue layer might score a fold line at low power, and a black layer might raster-engrave a logo. The operator sorts the artwork onto layers by what each part should do, and can also set the order in which layers run — engraving before cutting, so parts do not shift after they are freed.
Speed and power. Each layer gets its own speed (how fast the head moves) and power (how hard the tube fires, as a percentage the controller turns into PWM). These two numbers are the essence of laser work: high power and low speed cut deep; low power and high speed mark lightly. A layer set to cut 6 mm plywood might run slow at high power; a layer engraving a photo runs fast at low power. LightBurn also exposes finer controls — multiple passes for thick cuts, power ramping, dot spacing and dithering for images — but speed and power are the core dials.
Engrave versus cut. It is worth being precise about the two fundamental modes. A raster engrave sweeps the head back and forth across an area like an inkjet printer, firing in a fine pattern of dots to shade a filled image or block of text — this is how photographs and solid logos are burned in. A vector cut (or score) follows the outline of a shape as a continuous path, either all the way through (cut) or just marking the surface (score). A single job routinely uses all three, sorted onto layers.
Ordering, tabs, and kerf. A few finer controls turn a working job into a reliable one. Cut order decides the sequence of operations, and getting it right avoids two classic mistakes: engrave before you cut, so a freed part does not shift mid-engrave, and cut inner features (holes, cut-outs) before the outer perimeter, so the part is still held by its surrounding material while the detail is cut. Tabs (or bridges) are tiny uncut gaps left deliberately in a cut line so a part stays attached to the sheet until the job finishes, preventing small pieces from dropping through the honeycomb or tipping up into the head; they are snapped free afterward. Kerf is the width of material the beam actually removes — a fraction of a millimetre — and for parts that must fit together precisely, LightBurn’s kerf offset shifts each cut line inward or outward by half that width so a slot ends up the intended size. Node editing lets the operator clean up imported artwork — closing open paths, removing stray points, joining segments — so shapes cut as intended rather than leaving a gap where the beam never closed the loop.
4.7 Focus, framing, and test grids
Focus. Before running, the material surface must be brought to the lens’s focal point (Volume 2). With a motorised Z this can be automatic once the material thickness is entered; otherwise the operator sets it by hand, often with a focus gauge or spacer of the right length between the nozzle and the work. Focus is not a nicety: a cut that is out of focus is a cut that does not go through, or that comes out wide and charred.
Framing. LightBurn can frame a job — run the head around the bounding box of the design at low or zero power — so the operator can confirm the work is positioned correctly and nothing overhangs the edge of the material before committing to a burn. This is the moment to also confirm the exhaust is running and the air assist is on. Only then does the job start.
Test grids. The most valuable habit LightBurn enables is the material test. Faced with a new material or an unknown sheet, rather than guessing, the operator runs a test grid — a matrix of small squares burned at stepped speeds down the rows and stepped powers across the columns. Reading the grid shows at a glance which combination cuts cleanly, which merely marks, and which chars or fails to penetrate. Those winning numbers then become a saved entry in LightBurn’s material library, so the next job on that stock starts from a known-good setting instead of trial and error. Building up that library, material by material, is how a laser goes from finicky to dependable.
4.8 Running the job responsibly
The workflow ends where the safety volume begins: run the job, and stay with the machine. A laser cut is a controlled burn, and the two things most likely to go wrong — a flare-up becoming a fire, or a fault going unnoticed — are exactly the things an attentive operator catches in the first seconds. LightBurn makes the machine a pleasure to drive; it does not make it a machine that can be left alone. With a well-modified machine, a good material library, and the discipline to watch every cut, the 60 W CO2 laser becomes what all the upgrades are for: a fast, precise, repeatable tool that turns a drawing into a finished part. The final volume covers the safety, materials, and maintenance knowledge that keeps it that way.
Comments (0)